How To Manually Approve Registration In Zoom

On Demand Recordings Zoom Help Center
Scheduling A Webinar With Registration Zoom Help Center

Cara Mengaktifkan Fitur Registrasi Peserta Meeting Di Zoom Ruangmuda Com
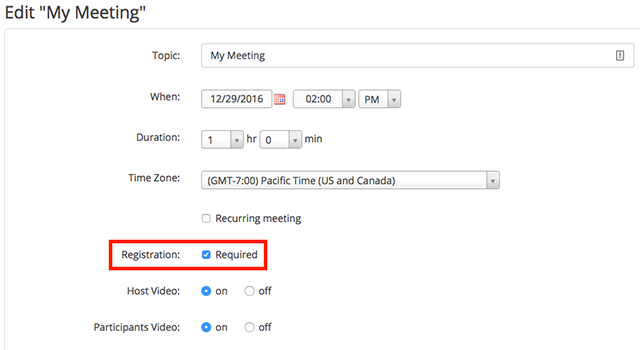
Setting Up Registration For A Meeting Zoom Help Center

Webinar Registration Customization Zoom Help Center
Set Zoom Registration Requirements

Select edit to the right of manage attendees.
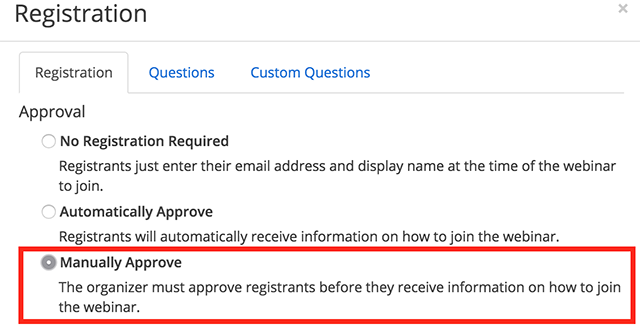
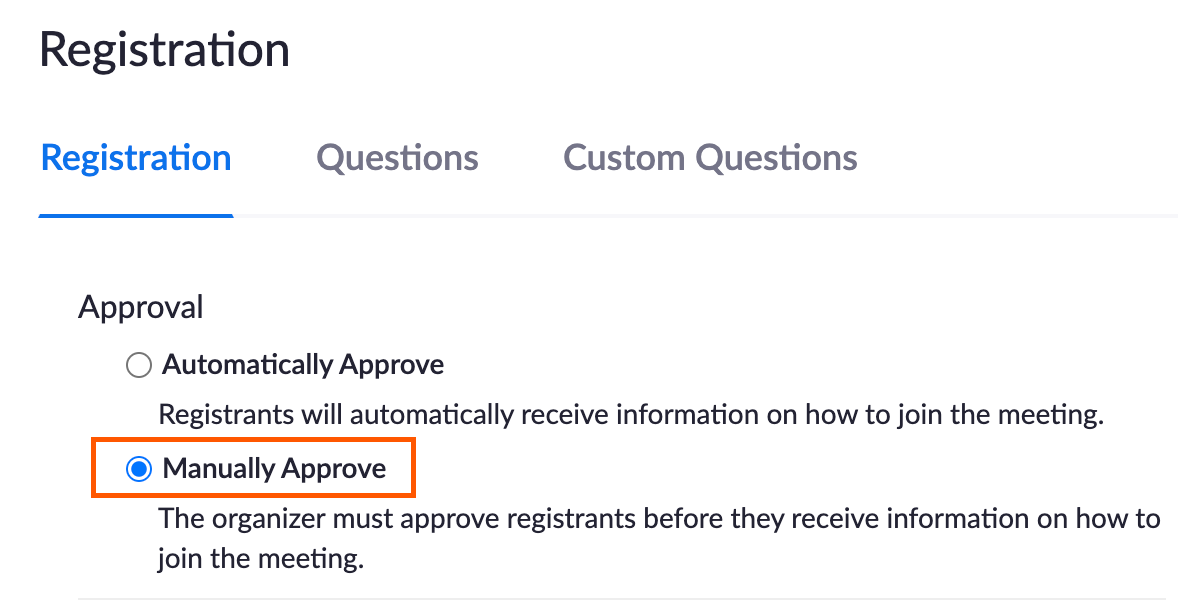
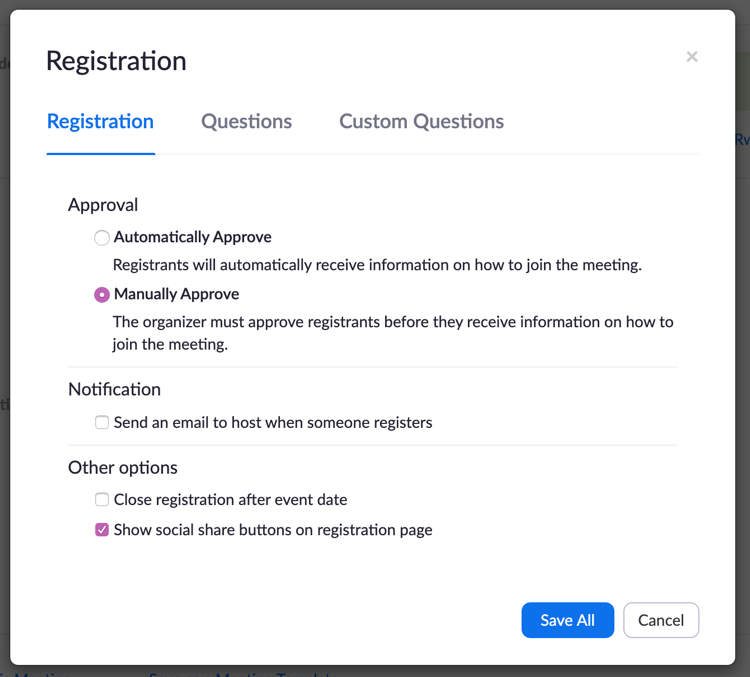
How to manually approve registration in zoom. Click the topic of the webinar that you want to customize. If the meeting approval type is set to 1 manually then in order to get the join url 3 requests are required instead of 1 request. In the navigation menu click meetings. Select the edit button next to registration options the registration window will appear. Currently this can be achieved when meeting approval type is set to 0 which means that any registrant is automatically approved.
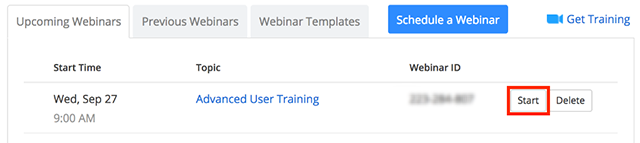
The meeting host can approve a registrant for the meeting manually via the zoom web portal. Scheduled webinar with registration enabled. I d like to pass status. If approved they will receive an email with information on how to join the webinar. Scroll down to the bottom of the webinar details page to view the registration options under invite attendees.
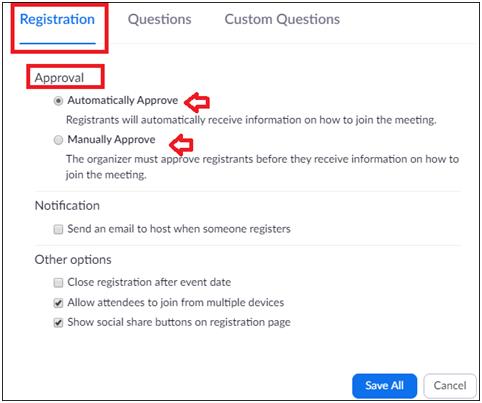
In the approval section click edit. If it lists manually approve click edit on the right side. Schedule your webinar with automatic approval or manual approval. In the registration section make sure to select the required check box. Scroll down to the invitations tab.
Enabling registration for a meeting. Next to approval it will list automatically approve or manually approve. If it lists manually approve click edit on the right side. Scroll down to the bottom of the webinar details page to view the registration options under invite attendees. You can select multiple registrants to approve or deny at the same time.
Registration questions and custom questions. With your webinar now scheduled. After scheduling the meeting the registration and branding tabs will appear. Schedule a new meeting or edit an existing meeting. Can be approved automatically if the host does not want to do it manually.
How To Enable Attendee Registration For Zoom

Woocommerce User Registration Plugin In 2020 Plugins Woocommerce Registration

Is There Any Way To Block To Join Participants The Meeting Zoom Api Zoom Developer Forum

Using Facebook Pixel With Zoom Zoom Help Center

How To Use Zoom Registration Track Your Meeting Attendance
Getting Started With Webinar Zoom Help Center

Joining And Participating In A Webinar Attendee Zoom Help Center
Zoom Privacy Tips Ucf

Billing Software Invoicing Software For Your Business Example Intended For Individual Invoice Template 10 Pr Invoice Template Invoice Format Invoice Example

Girl Scout Missed You At The Meeting Girl Scout Troop Leader Girl Scout Daisy Activities Girl Scout Activities

Campout Planner Scout Troop Guide And Planner Girl Scout Camping Daisy Girl Scouts Camping Checklist
Scheduling A Meeting

Extensions Club

