How To Download Icloud Photos To External Hard Drive Mac
Are Icloud Files Stored Locally Apple Community
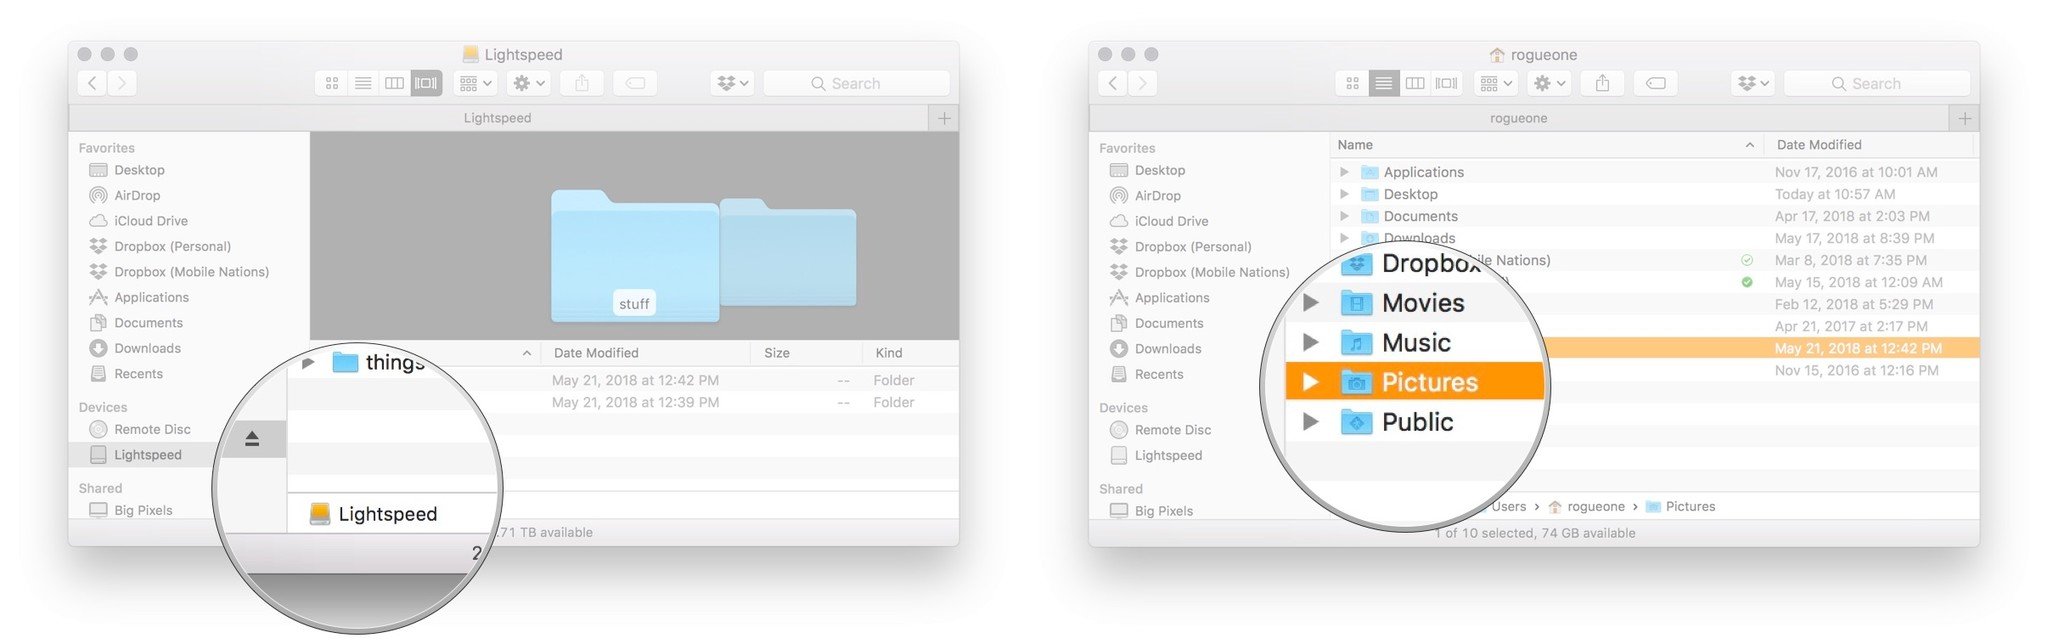
How To Use Photos For Mac With An External Hard Drive Imore

How To Move A Mac Photos Library To External Storage Save Space Back Up Macworld Uk
Easy Transfer All Icloud Photos To External Hard Drive Pc Mac
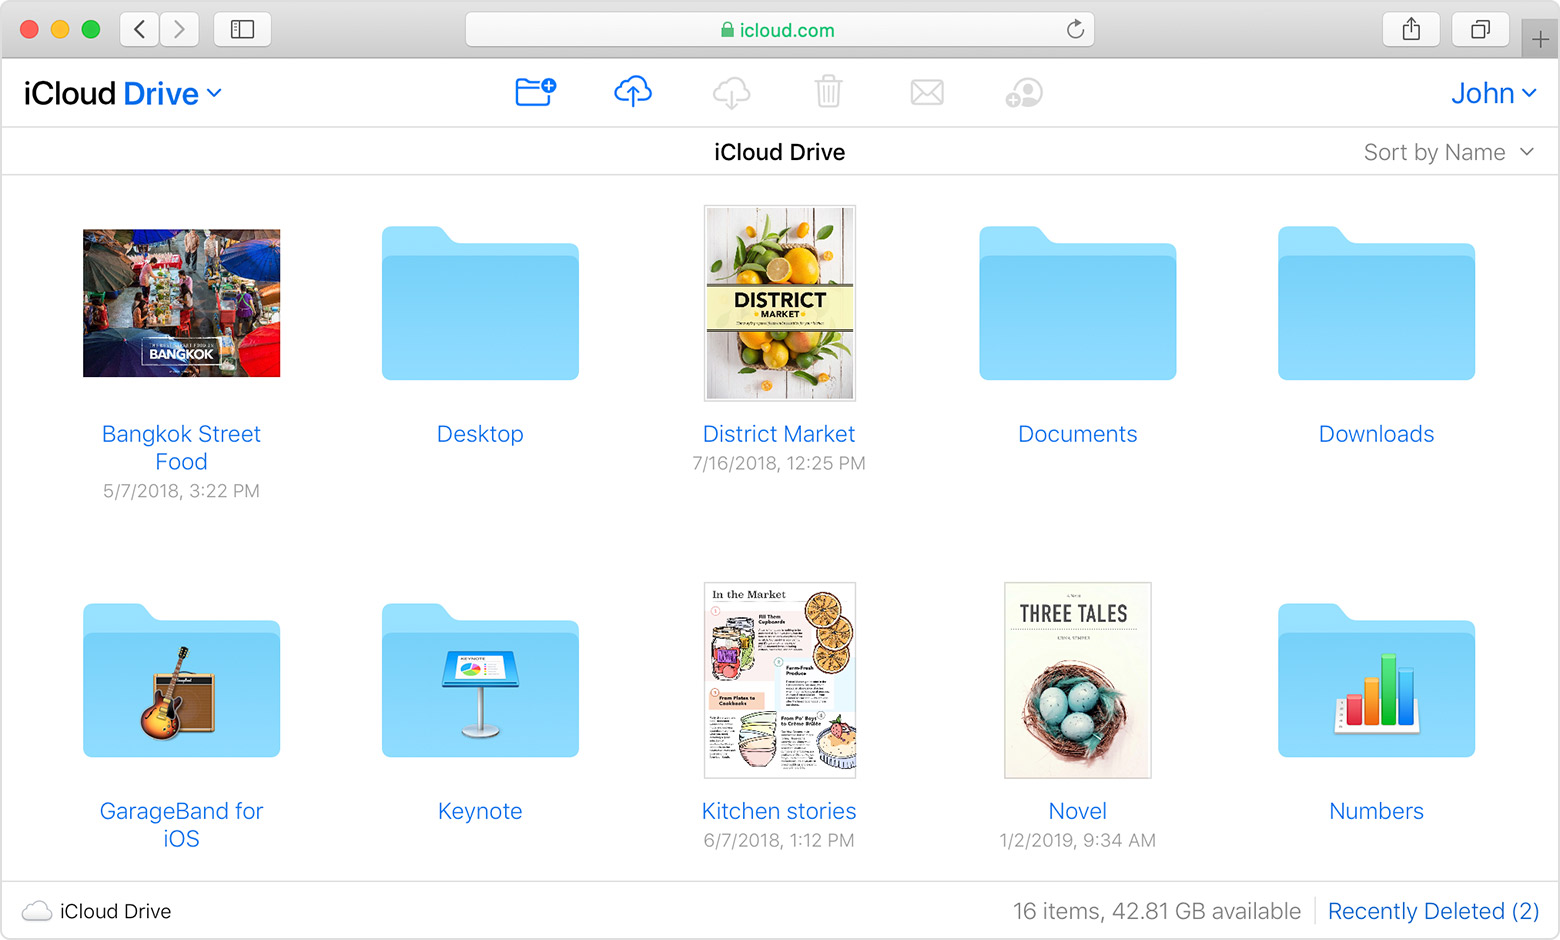
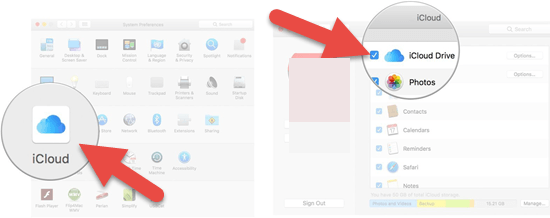
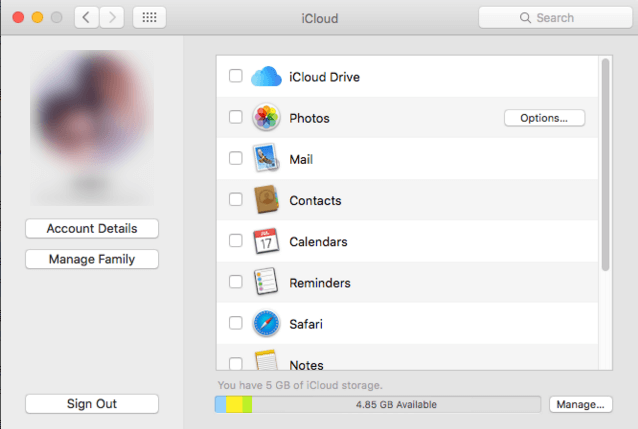
Add Your Desktop And Documents Files To Icloud Drive Apple Support
How To Move Documents From Icloud Back To Apple Community
2 1 step 1.
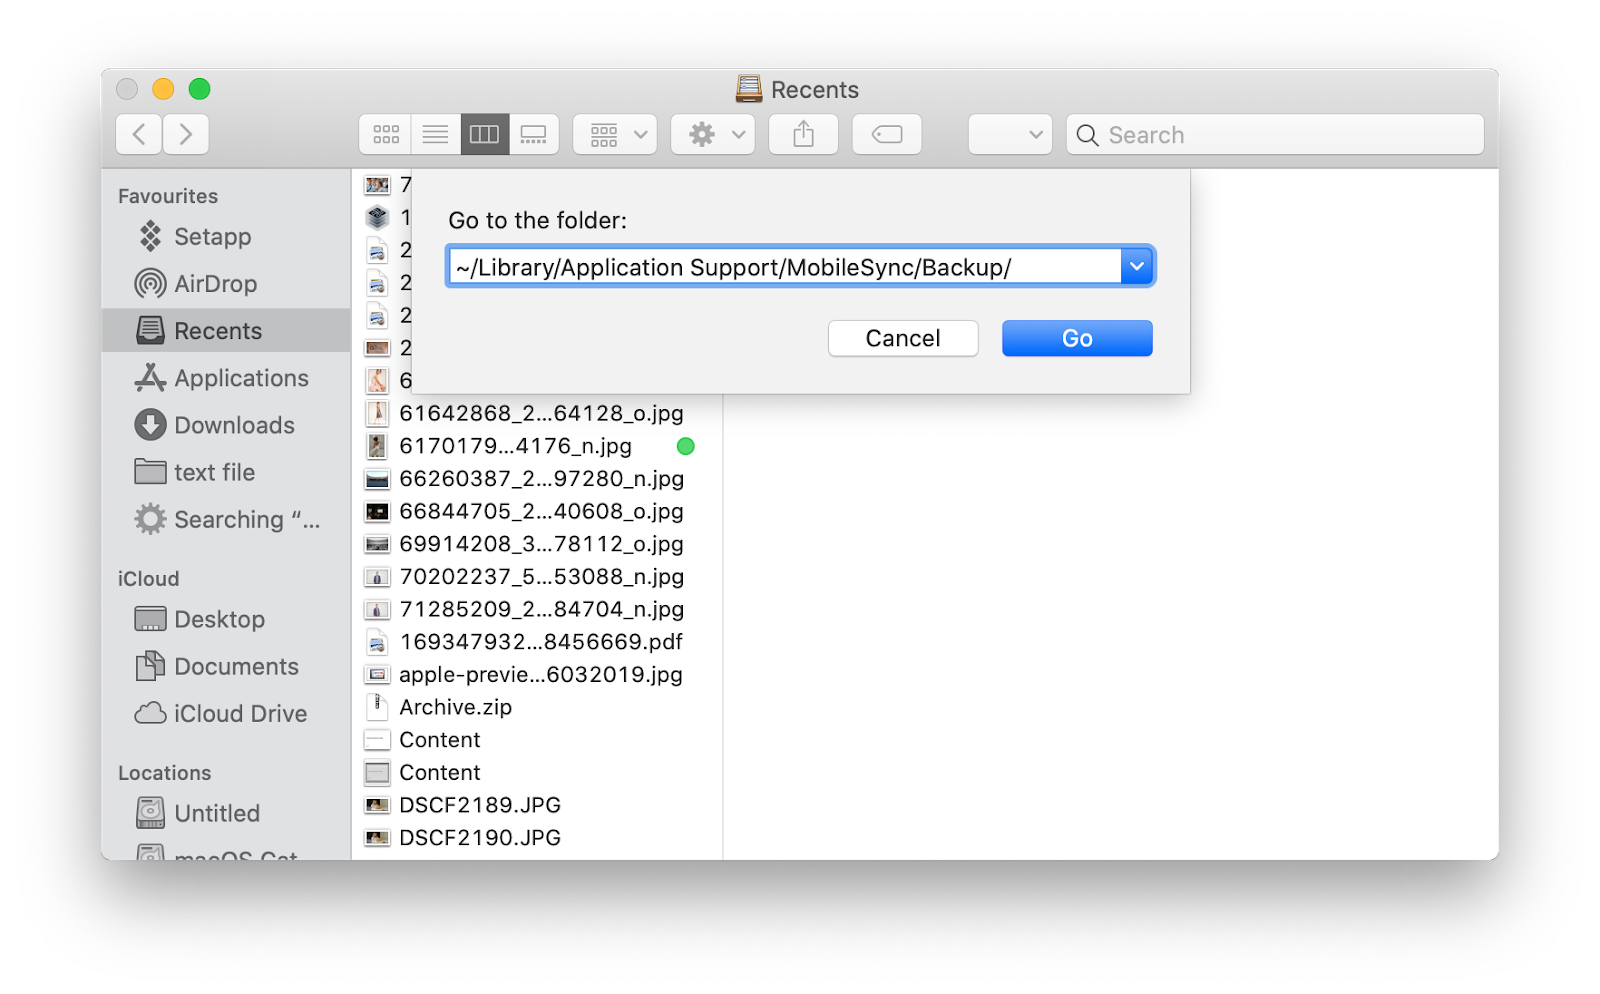
How to download icloud photos to external hard drive mac. Select icloud photo library to turn icloud back on for your photos. Change default download location. 2 3 step 3. Select photos to download. Download anytrans on your computer and c onnect your external hard drive to the computer click icloud manager sign in your apple id click photos.
After you are signed in click on the photos icon. Download all photos from icloud to mac using photos app. The easiest way to select and download photos from icloud to mac is by using the photos app on mac. If you have less than 1000 photos you can follow the steps below to select all icloud photos and download them to an external hard drive. 2 4 step 4.
Also this method has no limit on the number of photos being downloaded. 2 2 step 2. Step 3 with a list of photos emerging on your front you can select any image to download on your desired external location. Plug in your external hard drive to your computer via a usb cable. After you have downloaded the photos from icloud on your windows pc or mac you can start to transfer them to your external hard drive.
To transfer icloud photos to external hard drive selectively. Disconnect your external hard drive and verify that all of your photos are indeed in the photo library on the device. Find the photo files saved from icloud and copy them to your external hard drive with ease. For covering multiple images you need to hold the command key and select the photos simultaneously. However while using a mac there are several shortcuts that can be adapted to transfer photos from icloud onto the external hard drive.
Choose download originals to this mac. 2 6 step 5. 2 5 how do i download all photos from icloud. How to select multiple icloud photos using a mac. Once you are certain that the process is completed you can drag the photo library on your mac to the trash.

How To Share An External Hard Drive Between Mac And Windows Digital Trends External Hard Drive Digital Trends Time Machine Backup
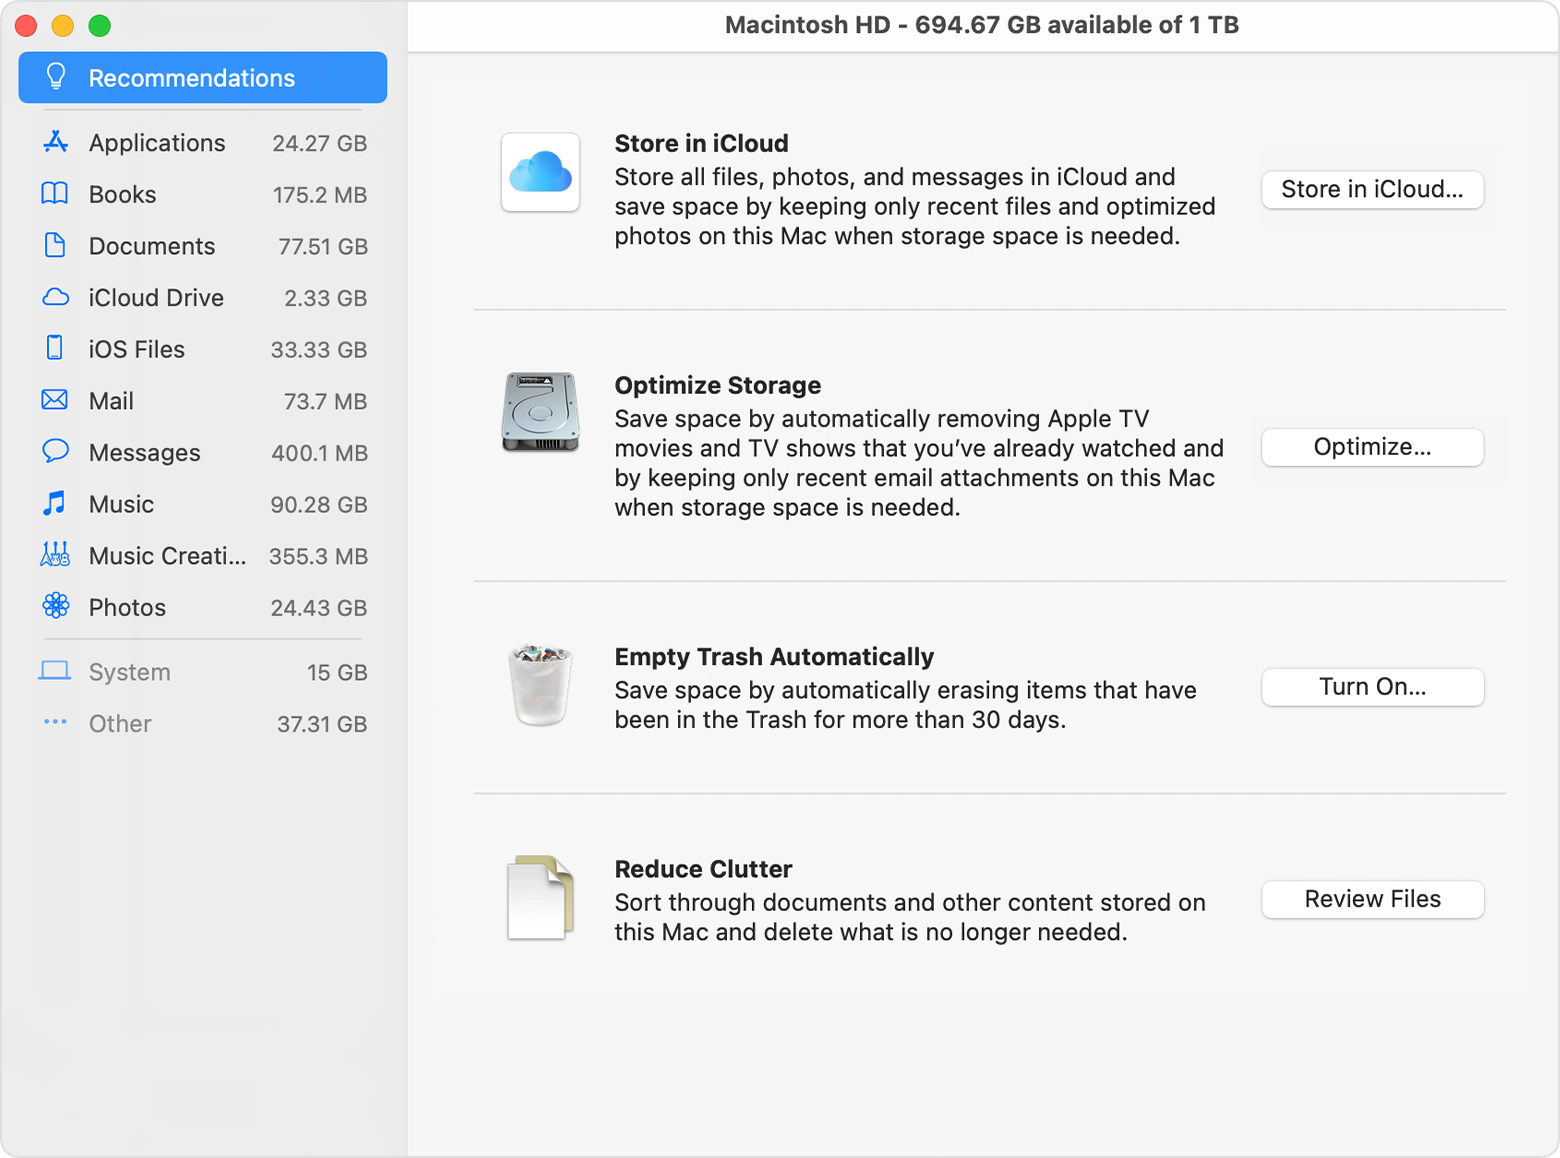
How To Free Up Storage Space On Your Mac Apple Support

How To Turn On Airdrop On Mac To Transfer Files Turn Ons Icloud Mac
How To Back Up Iphone To External Hard Drive

Pin On Downdload Software Cracks

Sync Iphone And Ipad With Icloud On Windows10 Pc Follow This Information And Get To Know How To Sync Iphone Ipad With Icloud On Window Icloud Iphone Ipad

How To Format Mac Hard Drive Filing System Hard Drive System

Apple S All New Icloud For Windows App Now Available In The Microsoft Store Windows Experience Blog

How To Back Up Your Icloud Photo Library Imore Icloud Photo Hidden Photos

Download Tenorshare 4ukey Free For Windows Mac Allmobitools Icloud How To Remove Ipod

Icloud Keeps Asking For Password Ios And Os X Fix Icloud Icloud Sign In Passwords
What S The Difference Between Icloud Backup And Icloud Drive
Guide How To Backup Macbook Pro To Icloud Imobie

